Logo Image Loses Quality When I Upload to Wordpress
Is your logo blurry no matter what y'all try?
You're non lone.
It'southward a problem for tons of people.
And here's why it's still an issue…
Theme developers that submit themes on wordpress.org (similar we exercise) have to use the built-in logo option in WordPress. But the built-in logo option doesn't have a second retina version for the logo.
As a theme developer, I have no clue what your logo will look like, so I can't create a pre-defined size without making things worse.
The result is a logo that only displays at standard definition which appears blurry on high resolution screens.
WordPress volition demand to add a retina version for logos in the Customizer, but for at present, I have a uncomplicated workaround for you.
This customization works for all of our themes and should work for the bulk of other WordPress themes too.
How to fix your pixelated logo
This solution is a little flake technical, just I've outlined the steps equally conspicuously as I can.
What you're going to do is upload a version of your logo that is 2x the normal size and and so utilise CSS to compress information technology downward to regular size (I wrote the code already for y'all).
For example, if the logo epitome you have currently displaying is 300px wide, then you'll upload a 600px wide version. When your paradigm file is exactly twice equally large as it shows upward on your site, it displays perfectly sharp on high-resolution screens. If yous look at the logo on this website right now, that's essentially what I'yard doing.
Now let's get to the steps.
Discover out what your ideal size is
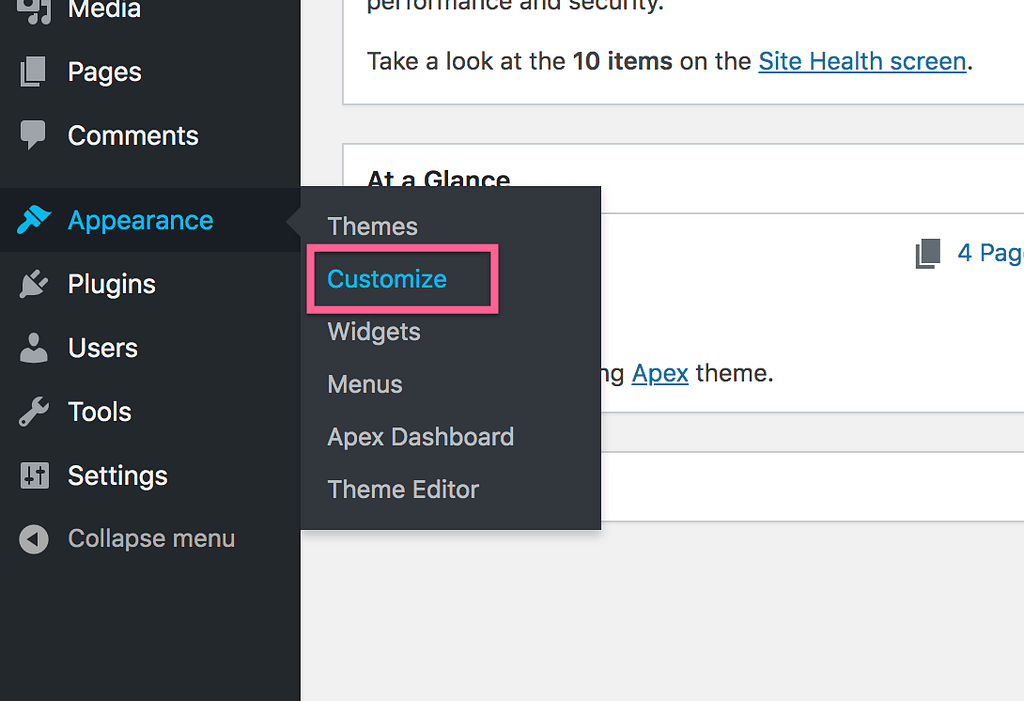
The commencement step is to login to your site and open up the Alive Customizer.
In one case inside the Customizer, click on the Boosted CSS section at the bottom.

Adjacent, copy and paste this code into the section:
.custom-logo, .site-header .logo { max-width: 100% !of import; width: 300px !important; height: auto !important; } You'll see your logo update instantly to be 300px wide. Ignore whether it's blurry or not right at present – we'll fix that in the next step.
In the CSS, modify the "300px" value until your logo displays at the size you want. Again, don't worry nearly blurriness, just edit it until it takes up the right amount of space on the site.
I know this might exist your first fourth dimension editing lawmaking, then here'southward a quick example of how the code would look if you decided your logo looks best when 450 pixels broad:
.custom-logo, .site-header .logo { max-width: 100% !important; width: 450px !important; meridian: auto !of import; } Make sense?
Once the logo takes up the right amount of space in the header, you tin can publish your changes or save information technology as a typhoon for now.
The next stride is to resize the image file itself.
Resize your image
For your logo to brandish sharp on your site, y'all'll need a version that is exactly twice every bit big as the size you entered in the CSS.
For example, if the CSS code makes the logo 450px wide, you'll want a copy of your logo image that is 900px wide.
If you don't have a big enough version of your image file, you'll need to get in touch with your logo designer or get access to the original pattern document to export a large enough size.
Otherwise, if you lot only accept a 600px wide original copy and so when yous stretch it to 900px and then the prototype is going to be blurry fifty-fifty when you view it on your computer.
In one case y'all've got a 2x sized version of the image, you're set for the final footstep.
Upload your new prototype
Inside the Customizer, locate the logo upload option. For about themes, information technology will be within the Site Identity section.
Upload your new 2x version of the logo and it will appear nice and sharp on the site.
To summarize, yous alter the logo size with CSS until information technology fills the correct amount of space in the header. So you upload an image that is twice that size, and it volition look sharp on high resolution screens.
This is essentially what retina support for images on the web does behind-the-scenes and this is a simple way to implement it yourself.
That'due south all there is to it!
Conclusion
It's a shame that WordPress doesn't have a good way to brandish high resolution logos, but the workaround is easy plenty.
You can alternatively upload an SVG version of your logo, merely this likewise requires adding SVG back up.
While you may not know anything about CSS, the steps here mainly requiring copying & pasting, and I promise that you enjoyed picking up some new technical skills past post-obit this tutorial.
If you want to larn more than about using CSS to customize your site, cheque out this tutorial:
How to Customize Your Theme with Custom CSS
And if this article helped you lot out today, please consider sharing it with someone else before you leave.
Thanks for reading!

Source: https://www.competethemes.com/blog/blurry-logo-wordpress/
0 Response to "Logo Image Loses Quality When I Upload to Wordpress"
Post a Comment